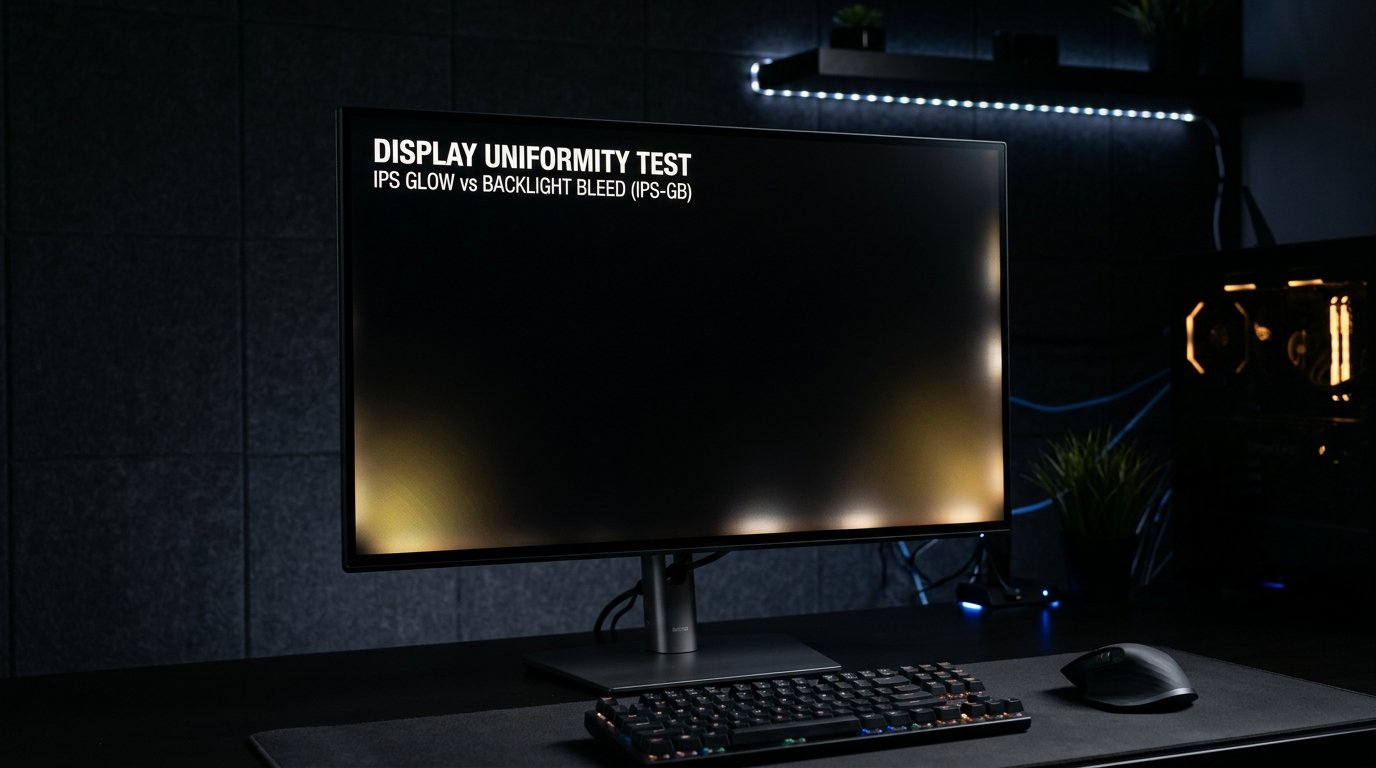
You just unboxed a brand-new computer monitor, powered it on, dimmed the room lights to watch a cinematic movie or dive into a dark gaming world, and immediately noticed bright, distracting halos of light radiating from the corners and edges of your display.
Your immediate instinct is panic: Is my monitor broken? Did I lose the panel lottery? Should I immediately package it up and file a return?
When diagnosing monitor light bleed and uneven screen illumination, two terms are constantly thrown around in tech forums, review sites, and customer support tickets: IPS glow and backlight bleed. While both display issues produce unwanted light on dark screens, they are fundamentally distinct in their physics, causes, and return eligibility.
Confusing the two can lead to endless frustration—such as returning a flawless monitor only to receive a replacement with the exact same behavior, or keeping a genuinely defective screen with severe frame assembly faults until your warranty window has passed.
In this in-depth guide, we will break down the precise mechanics of IPS glow vs backlight bleed, explain how liquid crystal alignment and bezel pressure create them, walk you through a foolproof step-by-step diagnostic test, and help you decide whether your monitor is normal or needs to be returned.
IPS Glow changes intensity, shifts position, or disappears entirely as you alter your viewing angle or step farther away from the screen. Backlight Bleed remains permanently locked in the exact same location along the bezel edges regardless of where you stand or how you tilt your head.
1. What Is Backlight Bleed? (Mechanics & Causes)
To understand backlight bleed (often abbreviated as BLB), it helps to understand the physical sandwich of layers that make up modern LCD (Liquid Crystal Display) monitors.
Unlike self-emissive displays (such as OLED or Micro-LED), liquid crystal panels cannot generate their own light. Instead, they rely on a powerful light source placed behind the display assembly. This backlight consists of arrays of bright Light Emitting Diodes (LEDs) arranged either along the perimeter of the screen (Edge-lit) or directly behind the panel (Direct-lit / FALD).
Light from the LEDs passes through several optical layers: a light guide plate (LGP), diffuser sheets to spread the luminance evenly, dual polarizing filters, and the liquid crystal substrate. The liquid crystal molecules act like billions of microscopic light valves, twisting or untwisting under electrical current to block light or let it pass through color filters (Red, Green, Blue subpixels).
Why Does Backlight Bleed Happen?
Backlight bleed is a mechanical defect. During manufacturing, assembly, or shipping transit, the external bezel, chassis frame, or adhesive gaskets may apply uneven pressure to the delicate edges of the LCD glass.
When the panel is pinched or improperly seated, a microscopic gap opens between the light guide plate and the front polarizing film. Raw, unpolarized light from the internal LEDs escapes directly around the edge of the panel, completely bypassing the liquid crystals that are trying to block it.
Visual Symptoms of Backlight Bleed
Backlight bleed presents very specific physical symptoms that distinguish it from standard crystal reflections:
- Bezel-Adjacent Torches and Flashlights: Bleed originates directly from the outer borders, bezels, or corners of the monitor frame, projecting bright, concentrated beams of light inward across the black screen.
- Fixed Physical Position: Because the light leak is caused by a physical gap or pressure point in the chassis, the bright spots remain in the exact same spot no matter where you position your eyes.
- Angle Independence: Whether you look at the screen straight on, from 45 degrees to the left, from above, or from 3 meters away, the light leak stays visible with the same relative shape and intensity.
- Pronounced Brightness: Severe backlight bleed is often bright enough to wash out colors and ruin contrast even in moderate room lighting, noticeably cutting through 16:9 or 21:9 letterbox black bars in films.
2. What Is IPS Glow? (In-Plane Switching Physics)
IPS glow is completely different from backlight bleed. It is not an assembly flaw, a damaged frame, or an escaped beam of light. Instead, IPS glow is an inherent optical characteristic of In-Plane Switching (IPS) panel technology itself.
IPS panels are celebrated across the display industry for their extraordinary color accuracy, uniform grayscale tracking, and wide 178°/178° viewing angles compared to older Twisted Nematic (TN) or standard Vertical Alignment (VA) monitors.
However, this wide viewing angle comes with an unavoidable optical trade-off. In an IPS panel, liquid crystal molecules are arranged in a horizontal plane and rotate parallel to the glass substrate when voltage is applied. When an IPS display attempts to render a pure black image, the liquid crystals rotate to block the backlight.
The Physics of Off-Angle Light Refraction
When you sit in front of a monitor, your eyes only view the exact dead-center of the screen at a true 90-degree perpendicular angle. As your gaze travels toward the outer corners and edges of the display, the angle of incidence between your eyes and the panel widens significantly (often 20° to 35° on large 27-inch, 32-inch, or ultrawide screens).
At these oblique angles, the parallel liquid crystal structure allows a small fraction of unpolarized light to refract through the matrix. This manifests to your eyes as a soft, hazy sheen or glow resting over the dark background.
Visual Symptoms of IPS Glow
IPS glow has very specific visual properties that make it easy to identify once you know what to look for:
- Corner-Focused Diffuse Haze: Glow typically appears across the four corners of the monitor (especially bottom-left and bottom-right when viewed from a seated desk position).
- Dynamic Angle Sensitivity: If you move your head from side to side or stand up, the glow visibly shifts across the panel. If you lean toward the top-right corner, the glow in that corner disappears while the bottom-left glow becomes more prominent.
- Distance Sensitivity: As you increase your physical distance from the monitor (stepping back from 50 cm to 2 meters), the viewing angles to the four corners flatten out toward 90 degrees, causing the IPS glow to vanish completely.
- Color-Shifting Tints: Depending on the specific panel manufacturer (LG Display, AU Optronics, BOE, or Innolux) and anti-glare coating, IPS glow often exhibits a subtle silvery, yellowish, orange, bronze, or bluish tint.
Unless an IPS monitor is equipped with an expensive specialized ATW (Advanced True Wide) polarizer—which is typically reserved for ultra-high-end professional color-grading monitors or select premium gaming displays—every single IPS monitor on the market exhibits some degree of IPS glow.
3. Head-to-Head Comparison: IPS Glow vs Backlight Bleed
To quickly diagnose the behavior of your monitor, use this comprehensive head-to-head comparison table analyzing the differences in causes, symptoms, panel types, and warranty policies:
| Diagnostic Feature | IPS Glow | Backlight Bleed | OLED / QD-OLED |
|---|---|---|---|
| Root Cause | Off-axis light refraction through parallel IPS liquid crystals | Mechanical bezel pinching, frame warping, or uneven gasket pressure | None (self-emissive individual subpixels) |
| Visual Appearance | Soft, diffuse sheen or hazy cloud spreading over corners | Sharp, concentrated “flashlighting” or bright streaks from edges | Perfect 0.000 nits pitch black |
| Viewing Angle Effect | Shifts, moves, or disappears as you change angle or step back | Completely static; remains fixed from all angles and distances | Uniform across extreme 178° angles |
| Color Cast / Tint | Silvery-white, amber, golden-yellow, or faint blue | Bright pure white or pale yellow (matches raw LED backlight) | No color cast (pixels are unpowered) |
| Affected Panels | IPS (In-Plane Switching), AH-IPS, Fast-IPS, Nano-IPS, PLS | Any LCD screen (IPS, VA, TN, Edge-lit LED TVs, Laptops) | Zero susceptibility |
| Mitigation Options | Bias lighting, increased viewing distance, lower brightness | Gentle bezel massage, lower brightness, RMA exchange | Not applicable |
| Warranty / Return Eligibility | Not covered (industry-standard normal behavior) | Eligible if severe and visible during normal usage | Covered under burn-in / dead pixel policies |
4. How to Test Your Monitor: Step-by-Step Diagnostic Guide
To accurately determine whether your display is exhibiting standard IPS glow, defective backlight bleed, or general screen uniformity issues (clouding/mura), follow this standardized diagnostic testing protocol.
Step 1: Set Up the Right Testing Environment
Testing a monitor under glaring overhead fluorescent lighting or direct sunlight will completely mask light leakage. Conversely, testing a monitor at maximum 100% brightness in a pitch-black cave will make even the most expensive display look terrible.
- Room Lighting: Dim your room lights to a typical dark evening setting (or turn them off completely for the initial inspection).
- Warm-Up Time: Allow your monitor to run for at least 15 to 30 minutes before testing. Liquid crystals, diffuser layers, and thermal chassis plastics expand slightly as they reach operating temperature, which can alter frame pressure.
- Set Realistic Brightness: Reduce your monitor's OSD hardware brightness setting to normal everyday levels (typically between 25% and 45%, equivalent to 100–140 nits). Running a monitor at 100% brightness in a dark room is unrealistic and unnaturally amplifies optical glow.
Step 2: Launch a Fullscreen Black Test Pattern
Open our dedicated, zero-dependency browser tool: Fullscreen Backlight Bleed Test.
Click anywhere on the canvas or press F11 to enter full-screen mode. This removes all operating system taskbars, browser navigation bars, and glowing desktop icons, presenting a pure, uncompressed #000000 black canvas across all physical pixels.
Step 3: Perform the "Distance and Angle" Test (The Definitive Check)
This is the single most critical test in display diagnostics:
A. Normal Seated Position Check
Sit in your standard computing chair at your normal viewing distance (approx. 50–70 cm / 20–28 inches). Look directly at the center of the screen. Take note of any light patches in the corners or along the perimeter.
B. Head Movement & Tilt Test
Slowly move your head from left to right, and up and down. Align your direct line of sight perpendicularly with each glowing corner one by one. If the glow in a corner dims or vanishes as soon as you look directly at it, that corner is experiencing IPS glow.
C. The 2-Meter Step-Back Test
Stand up and take 4 to 6 steps backward until you are roughly 2 to 3 meters (6 to 10 feet) away from your display. Look at the screen. Because the viewing angles to all four corners are now nearly 90 degrees, all IPS glow will vanish. Any bright white streaks or localized patches that remain clearly visible along the edges are genuine backlight bleed.
Step 4: Check for Frame Pinch Points
If you identified static backlight bleed in Step 3, gently place a clean microfiber cloth over your finger and apply very light pressure to the plastic bezel immediately adjacent to the light leak.
If the light leak shifts dramatically, spreads, or temporarily diminishes, the cause is an overtightened chassis screw, pinched internal frame clip, or uneven factory adhesive.
5. The "Camera Trap": Why Smartphone Photos Lie
If you have ever visited a tech forum like Reddit's r/Monitors, you have undoubtedly seen horror-story photos of screens looking like radioactive yellow sunbursts accompanied by the caption: "Look at how awful my backlight bleed is!"
In over 80% of these cases, the monitor looks completely acceptable in real life. The user has fallen into the smartphone camera exposure trap.
Modern smartphones feature computational night modes and automatic ISO adjustments. When pointed at a dark screen in a dim room, the camera sensor attempts to maximize dynamic range by boosting ISO (often 1600–6400) and increasing shutter exposure times (1/2s to 2s). This accumulates microscopic photons that the human eye cannot see, transforming subtle, imperceptible corner glow into blazing nuclear flares on camera.
How to Take an Accurate Screen Photo for RMA Warranty Claims
If you need to document genuine backlight bleed for a manufacturer warranty replacement or retailer return, never use automatic point-and-shoot camera modes. Follow these professional capture settings:
- Switch your smartphone camera to Pro Mode / Manual Mode.
- Lock the ISO to a low setting (between 100 and 200).
- Set the Shutter Speed to approximately 1/15s to 1/30s.
- Step back at least 1.5 to 2 meters from the monitor and use 2x optical zoom to eliminate lens-edge distortion.
- Adjust the exposure slider until the preview on your phone screen closely matches what your eyes actually perceive in the dark room.
6. What About VA, TN, Mini-LED, and OLED Screens?
Display technologies vary dramatically in how they handle black levels, contrast ratios, and light containment:
- VA (Vertical Alignment) Panels: VA panels align liquid crystal molecules vertically when off. This blocks backlight significantly better than IPS, achieving deep native contrast ratios of 3000:1 to 5000:1 (compared to 1000:1 on standard IPS). VA panels suffer almost zero IPS glow, though they can still exhibit edge backlight bleed and “VA clouding / mura”.
- TN (Twisted Nematic) Panels: TN panels do not have IPS glow, but they suffer from severe vertical color shifting and narrow viewing angles. Looking at a TN screen from below will cause colors to completely invert into a dark negative image.
- Mini-LED Displays (FALD): Mini-LED monitors replace traditional edge lighting with thousands of tiny LED backlights divided into hundreds or thousands of independent local dimming zones. When a zone displays black, its LEDs switch off completely, virtually eliminating backlight bleed. However, high-contrast objects (like a white mouse cursor on a black background) can create a faint halo known as blooming.
- OLED & QD-OLED Panels: OLED panels use organic self-emissive subpixels. When displaying pure black, each pixel turns off completely, producing a true 0.000-nit black level and infinite contrast ratio. OLED displays have zero backlight bleed and zero IPS glow.
If you are evaluating an organic panel, consult our specialized guide on OLED Screen Testing and Burn-in Inspection.
7. Distinguishing Bleed From Other Monitor Display Issues
When inspecting a new or existing screen, do not confuse light containment issues with other common display defects:
Symptoms: Individual stationary microscopic dots. A dead pixel stays permanently black on light colors, while a stuck subpixel stays frozen red, green, or blue.
Symptoms: Fuzzy text, soft edges, chromatic aberration around fonts, or non-native scaling across applications.
Symptoms: Rapid brightness oscillations, brief signal dropouts, or pulsing horizontal lines across variable frame rates.
If you just purchased a new display, we strongly recommend following our comprehensive pre-return audit: Bought a New Monitor? 10 Things to Check Before Your Return Window Ends.
8. How to Reduce and Mitigate IPS Glow and Light Bleed
While you cannot completely eliminate the physical crystal properties of an IPS panel, you can drastically minimize visible glow and minor light bleed through five proven environmental and hardware adjustments:
1. Install 6500K LED Bias Lighting Behind the Monitor
The most effective solution for IPS glow. Sticking a calibrated 6500K (daylight white) LED light strip to the back of your monitor illuminates the wall behind the screen. This ambient light causes your eye pupils to constrict naturally. As your iris narrows, your eyes let in less stray light, making dark areas of the screen appear significantly deeper black and rendering corner glow virtually invisible.
2. Calibrate Display Brightness to Ambient Room Levels
Most monitors ship from the factory set to 100% brightness (often 300 to 450 nits) to stand out on retail showroom floors. In a dim home office or gaming room, this is excessively harsh on your eyes and forces the LED backlight to blaze at maximum intensity. Lowering brightness to 30%–45% (120 nits) dramatically reduces light leakage while protecting your eye health.
3. Optimize Viewing Distance, Height, and Tilt
Because IPS glow is governed by viewing angle, sitting too close to a large 27-inch, 32-inch, or ultrawide panel increases the angle to the corners. Push your monitor back so it is at least an arm's length away (approx. 70–80 cm / 28–32 inches). Adjust the monitor height so the top third of the panel is level with your horizontal eye line, and tilt the screen backward by 3 to 5 degrees to square the panel with your line of sight.
4. Relieve Frame and VESA Mount Pinch Pressure
If you mounted your monitor to a third-party monitor arm, overtightening the four VESA plate screws can flex the internal chassis and induce severe edge bleed. Loosen the VESA screws slightly so they are snug rather than forcefully torqued. Ensure heavy display cables (DisplayPort/HDMI) are not pulling tightly on input ports.
5. The Gentle Microfiber Bezel Massage (Use Caution)
If you have a localized backlight bleed pinch spot along a plastic bezel, wrap a soft microfiber cloth around your thumb and gently massage the plastic bezel outwards away from the glass. In some cases, this relaxes tight factory friction clips and allows the panel layers to reseat evenly. Never press hard against the LCD glass itself.
9. When Should You Return or RMA Your Monitor?
Every monitor purchase involves what the display community calls the "Panel Lottery". Due to microscopic manufacturing tolerances in liquid crystal deposition, light guide fabrication, and chassis clamping, no two identical monitor models will have 100% identical light uniformity.
Knowing whether your specific panel is within acceptable tolerances or warrants an immediate return can save you hours of frustration:
Panel Uniformity Assessment Guide
✓ Normal / Keep the Monitor
- Glow is only visible in a pitch-black room when viewing pure black screens.
- Corner light changes position or disappears when you shift your head or step back.
- In games, desktop work, and movies with normal lighting, black levels look uniform and solid.
- No bright yellow or white flashlights bleeding into content with ambient room lights on.
✗ Defective / Return or RMA
- Sharp, concentrated white/yellow light leaks are visible even with room lights turned on.
- Light bleed cuts through movie letterbox bars or dark game scenes from all viewing angles.
- Bright torching remains completely visible when standing 2–3 meters away.
- Severe color temperature disparity (e.g. left side warm yellow, right side cool blue).
- Accompanied by cluster dead pixels or persistent flickering.
Remember: If you return an IPS monitor solely because it has standard, mild IPS glow, your replacement monitor will almost certainly have the exact same level of glow—and might even arrive with genuine backlight bleed or dead pixels. Only exchange the monitor if it has true, severe, static backlight bleed or distracting color tinting.
Learn more about industry defect thresholds in our detailed overview of Dead Pixel & Display Warranty Standards.
10. 10-Point Screen Uniformity Diagnostic Checklist
Use this quick diagnostic checklist to inspect any monitor or laptop display within its return window:
Display Uniformity & Light Bleed Inspection Checklist
11. Final Thoughts
Experiencing uneven lighting on a brand-new monitor is one of the most common surprises for PC enthusiasts and creative professionals. However, understanding the physical difference between IPS glow vs backlight bleed empowers you to make an objective, rational decision rather than second-guessing your purchase.
If the light changes with your viewing angle, softens as you increase your distance, and vanishes under modest bias lighting, you are looking at standard, harmless IPS glow—the natural physics of one of the most vibrant, color-accurate display technologies ever built.
On the other hand, if you see intense, static beams of white light leaking from the bezel frame that cut through your content regardless of viewing angle and distance, you have identified genuine backlight bleed. If it is severe enough to compromise your daily viewing experience, do not hesitate to contact your retailer or manufacturer for an exchange while within your return window.
Ready to Test Your Screen's Uniformity?
Launch our suite of high-precision, zero-dependency browser diagnostic tools to test for backlight bleed, dead pixels, color uniformity, and refresh rate.
Frequently Asked Questions
What is the main difference between IPS glow and backlight bleed?
The primary difference is angle dependence. IPS glow changes in intensity, shifts position, or disappears when you change your viewing angle or step back from the screen. Backlight bleed remains fixed in the exact same spot along the bezels regardless of your viewing angle or distance.
Is IPS glow considered a manufacturing defect covered by warranty?
No. IPS glow is an inherent physical characteristic of In-Plane Switching liquid crystal technology caused by wide-angle light refraction. Manufacturers do not classify normal IPS glow as a defect and will not approve warranty RMA claims for standard glow.
Can backlight bleed get worse over time?
Backlight bleed typically remains stable once the panel settles. However, physical impacts, thermal expansion cycles from extended high-brightness use, excessive monitor arm clamping pressure, or loose bezel housings can occasionally worsen light leakage over time.
Why do smartphone photos make IPS glow and backlight bleed look 10 times worse?
Smartphone cameras automatically activate night modes with elevated ISO and extended exposure times in dark rooms. The camera sensor collects far more light than the human retina, exaggerating faint corner reflections into blinding white or amber patches.
Does bias lighting help reduce IPS glow and monitor light bleed?
Yes. Placing a neutral 6500K LED bias light strip behind your monitor illuminates the wall behind the display. This causes your eye pupils to constrict naturally, significantly deepening perceived black levels and virtually eliminating visible IPS glow.
Do OLED and QD-OLED monitors suffer from backlight bleed or IPS glow?
No. OLED and QD-OLED panels use self-emissive organic pixels where individual pixels switch off completely when displaying black (0.000 nits). Because there is no external LED backlight layer or liquid crystal array, OLED displays have zero backlight bleed and zero IPS glow.
Can backlight bleed cause dead pixels or display damage?
Backlight bleed is an optical light containment issue between the backlight and the bezel frame; it does not electrically damage liquid crystals or create dead pixels. However, severe physical pressure causing bleed could potentially risk subpixel damage if left unaddressed.